1. Sign In or Sign Up
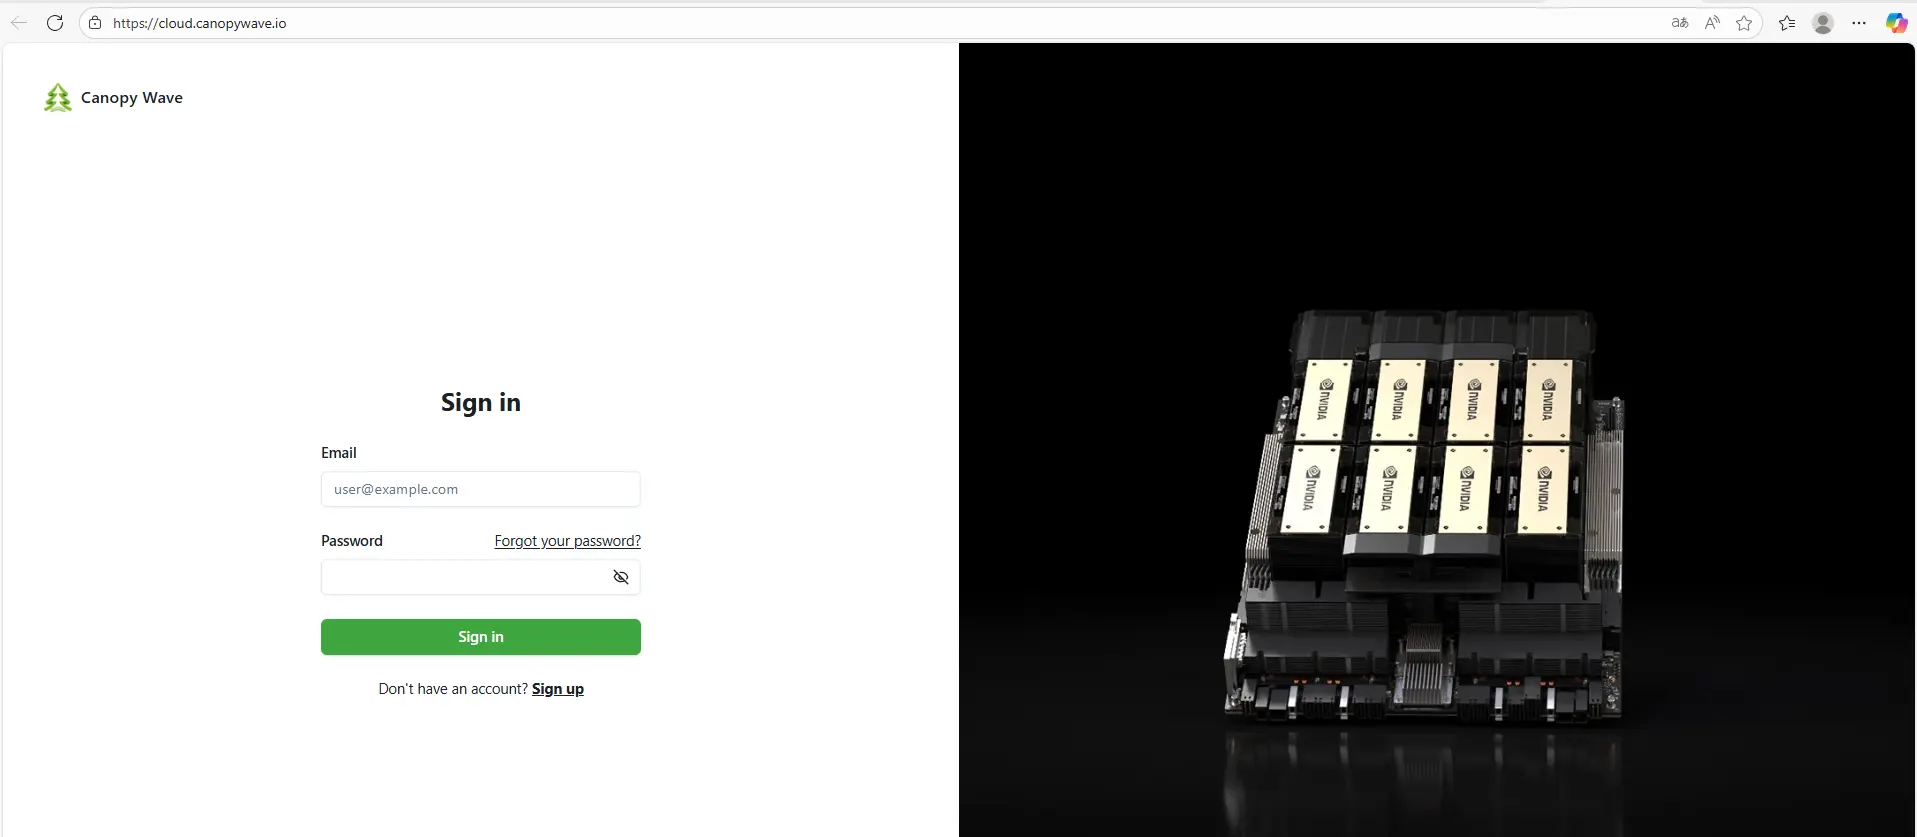
Click the Canopy Wave link to register or sign in.
1) Sign in/ Sign up.
- For existing users: Enter your email and password, then click Sign In.
- For new users: Click Sign Up.
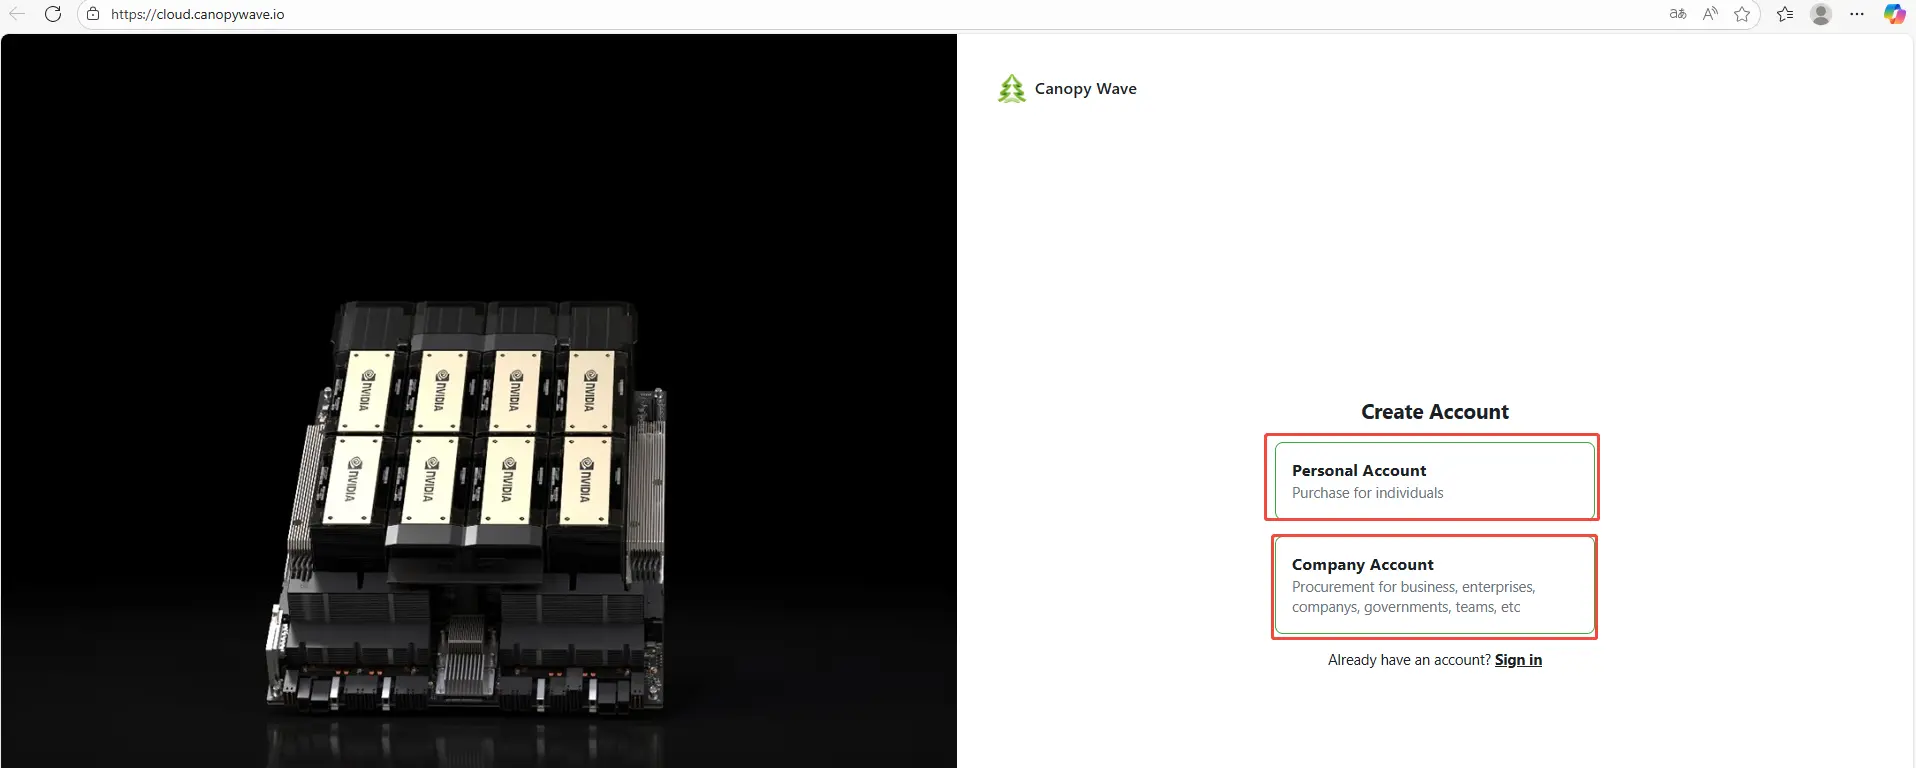
2) Registration Process
On the registration page, select your account type (Personal or Company) and complete all required fields.
3) Complete Registration
After registration is complete, you will be redirected to the sign-in page. Please sign in to your new account.
2. Access the Dashboard
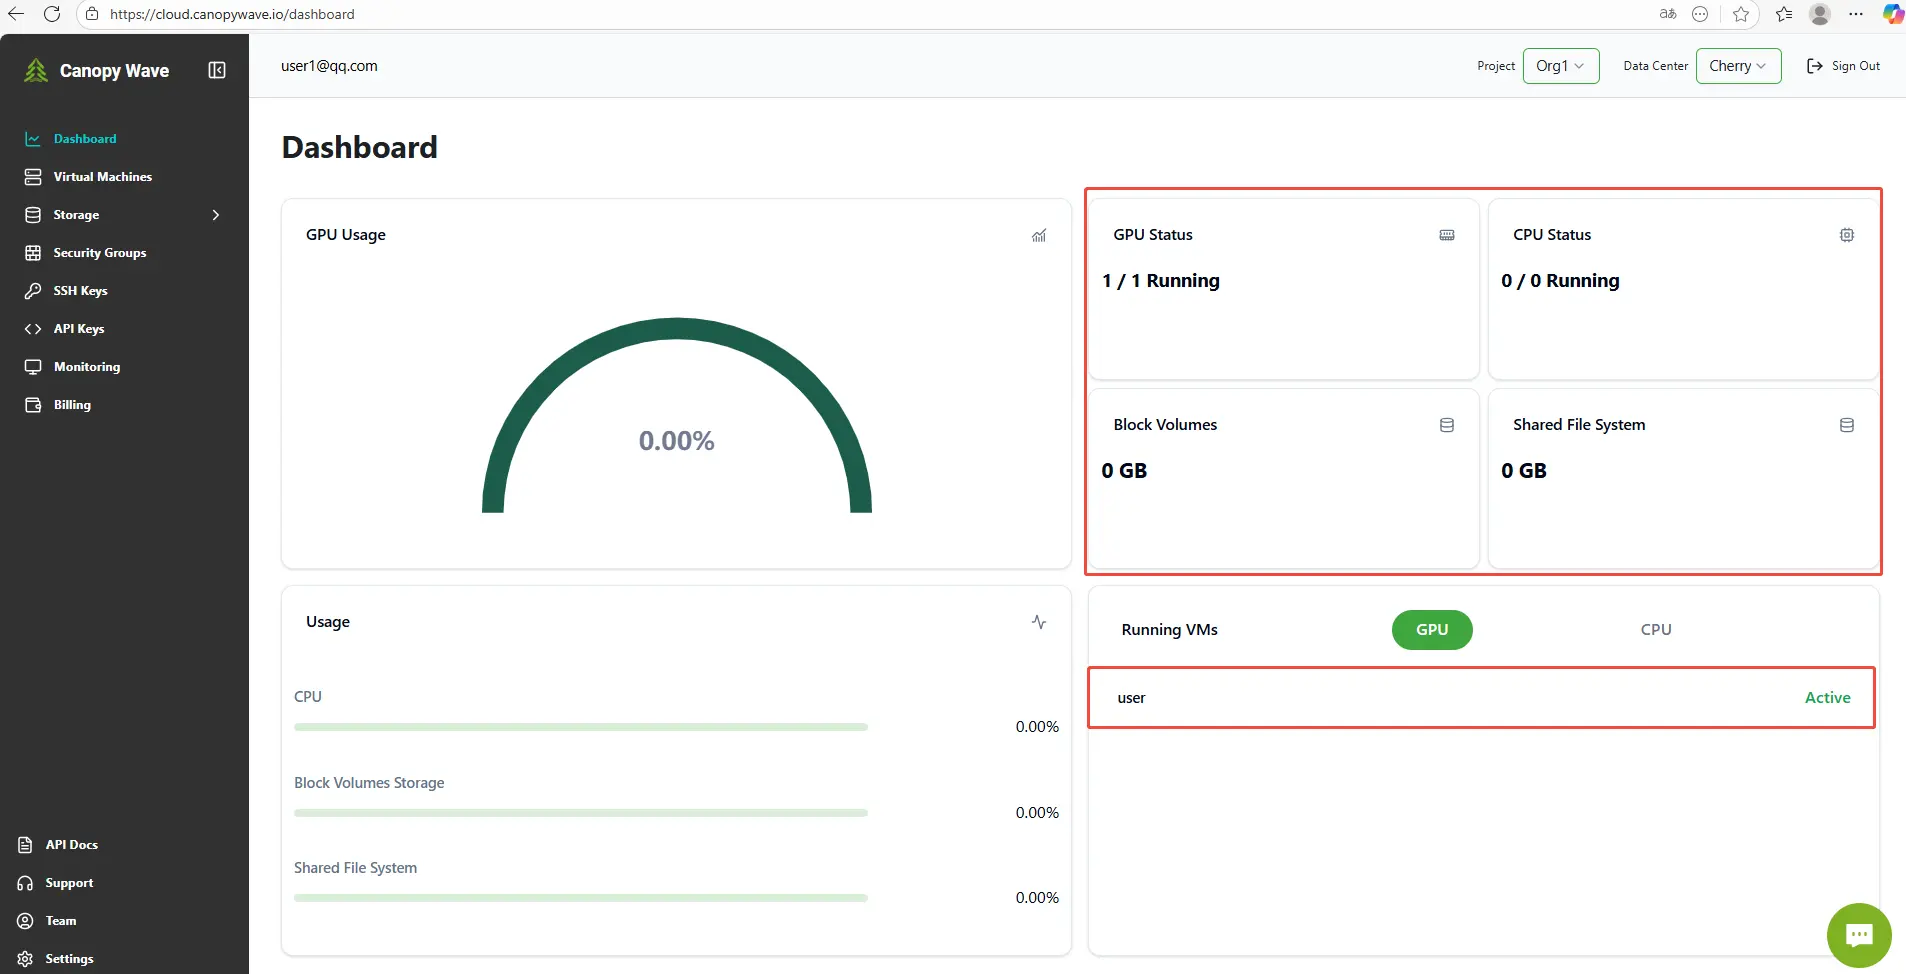
The dashboard allows you to monitor GPU utilization, VM status, and other critical metrics. You can navigate between modules by clicking on items like GPU Status or CPU Status. In the Running VMs section, select GPU or CPU to view detailed resource allocation.
3. Deploy an Instance
Within this interface, you can provision GPU or CPU-enabled VM instances and allocate public IP addresses.
The creation process is the same for both GPU and CPU virtual machines. The following steps use a GPU VM as an example.
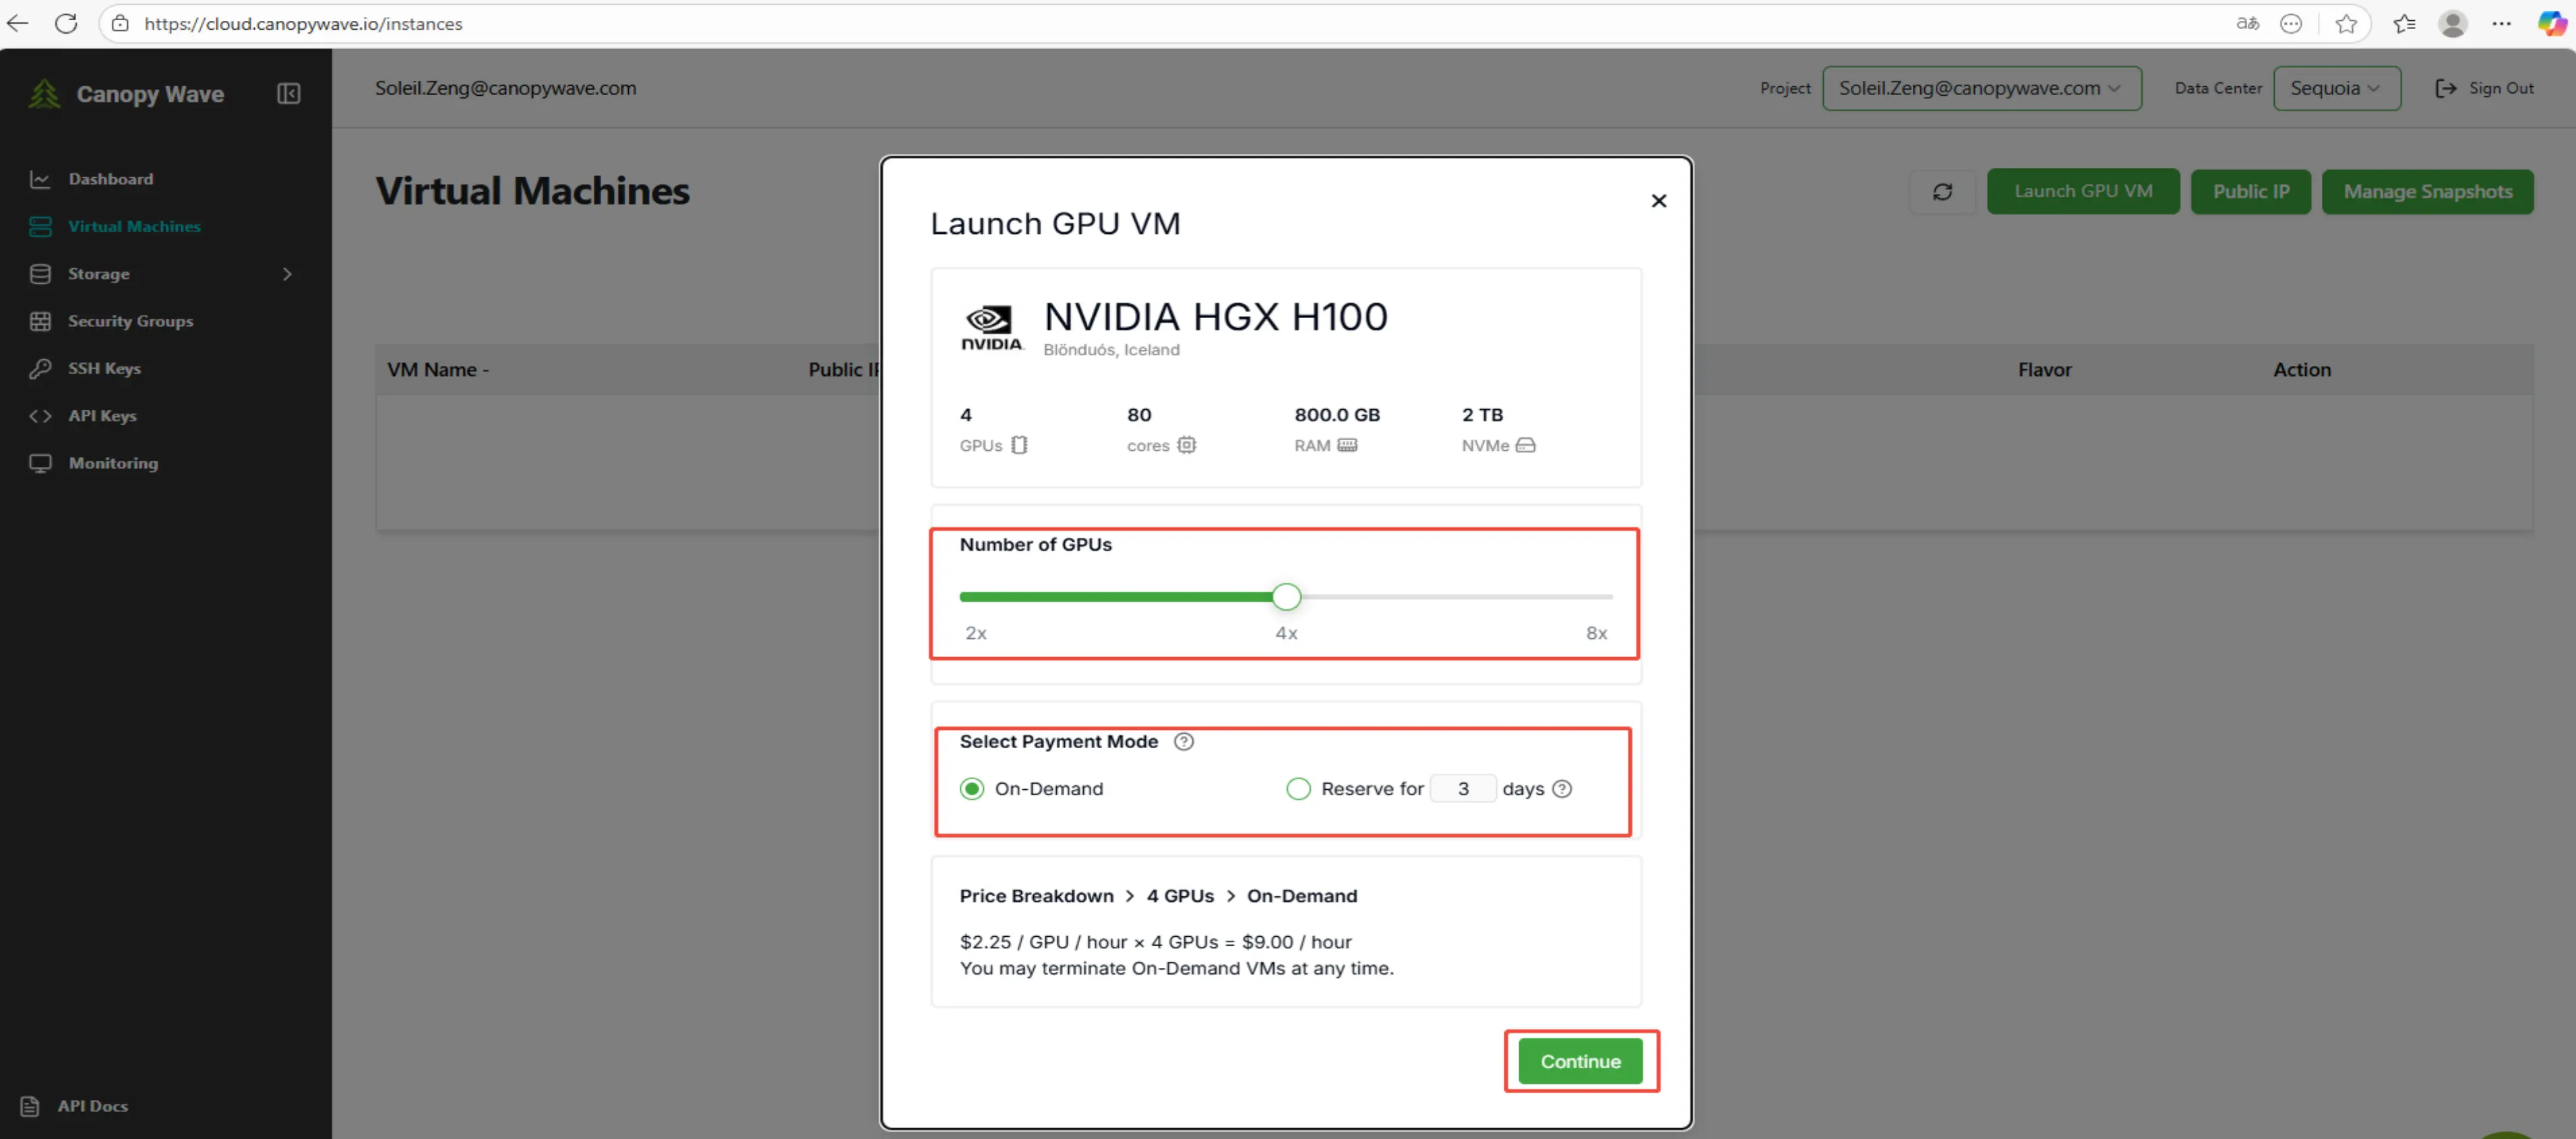
1) Launch GPU VM
Click the button "Launch GPU VM" to create a virtual machine.

2) Configure GPU and Payment
Select number of GPUs, select Payment Mode, click the button "Continue".
Payment Modes: We offer two models: On-Demand and Reserved. Reserved instances receive a 10% discount but require specifying a usage duration. Hourly rates are displayed for your reference.
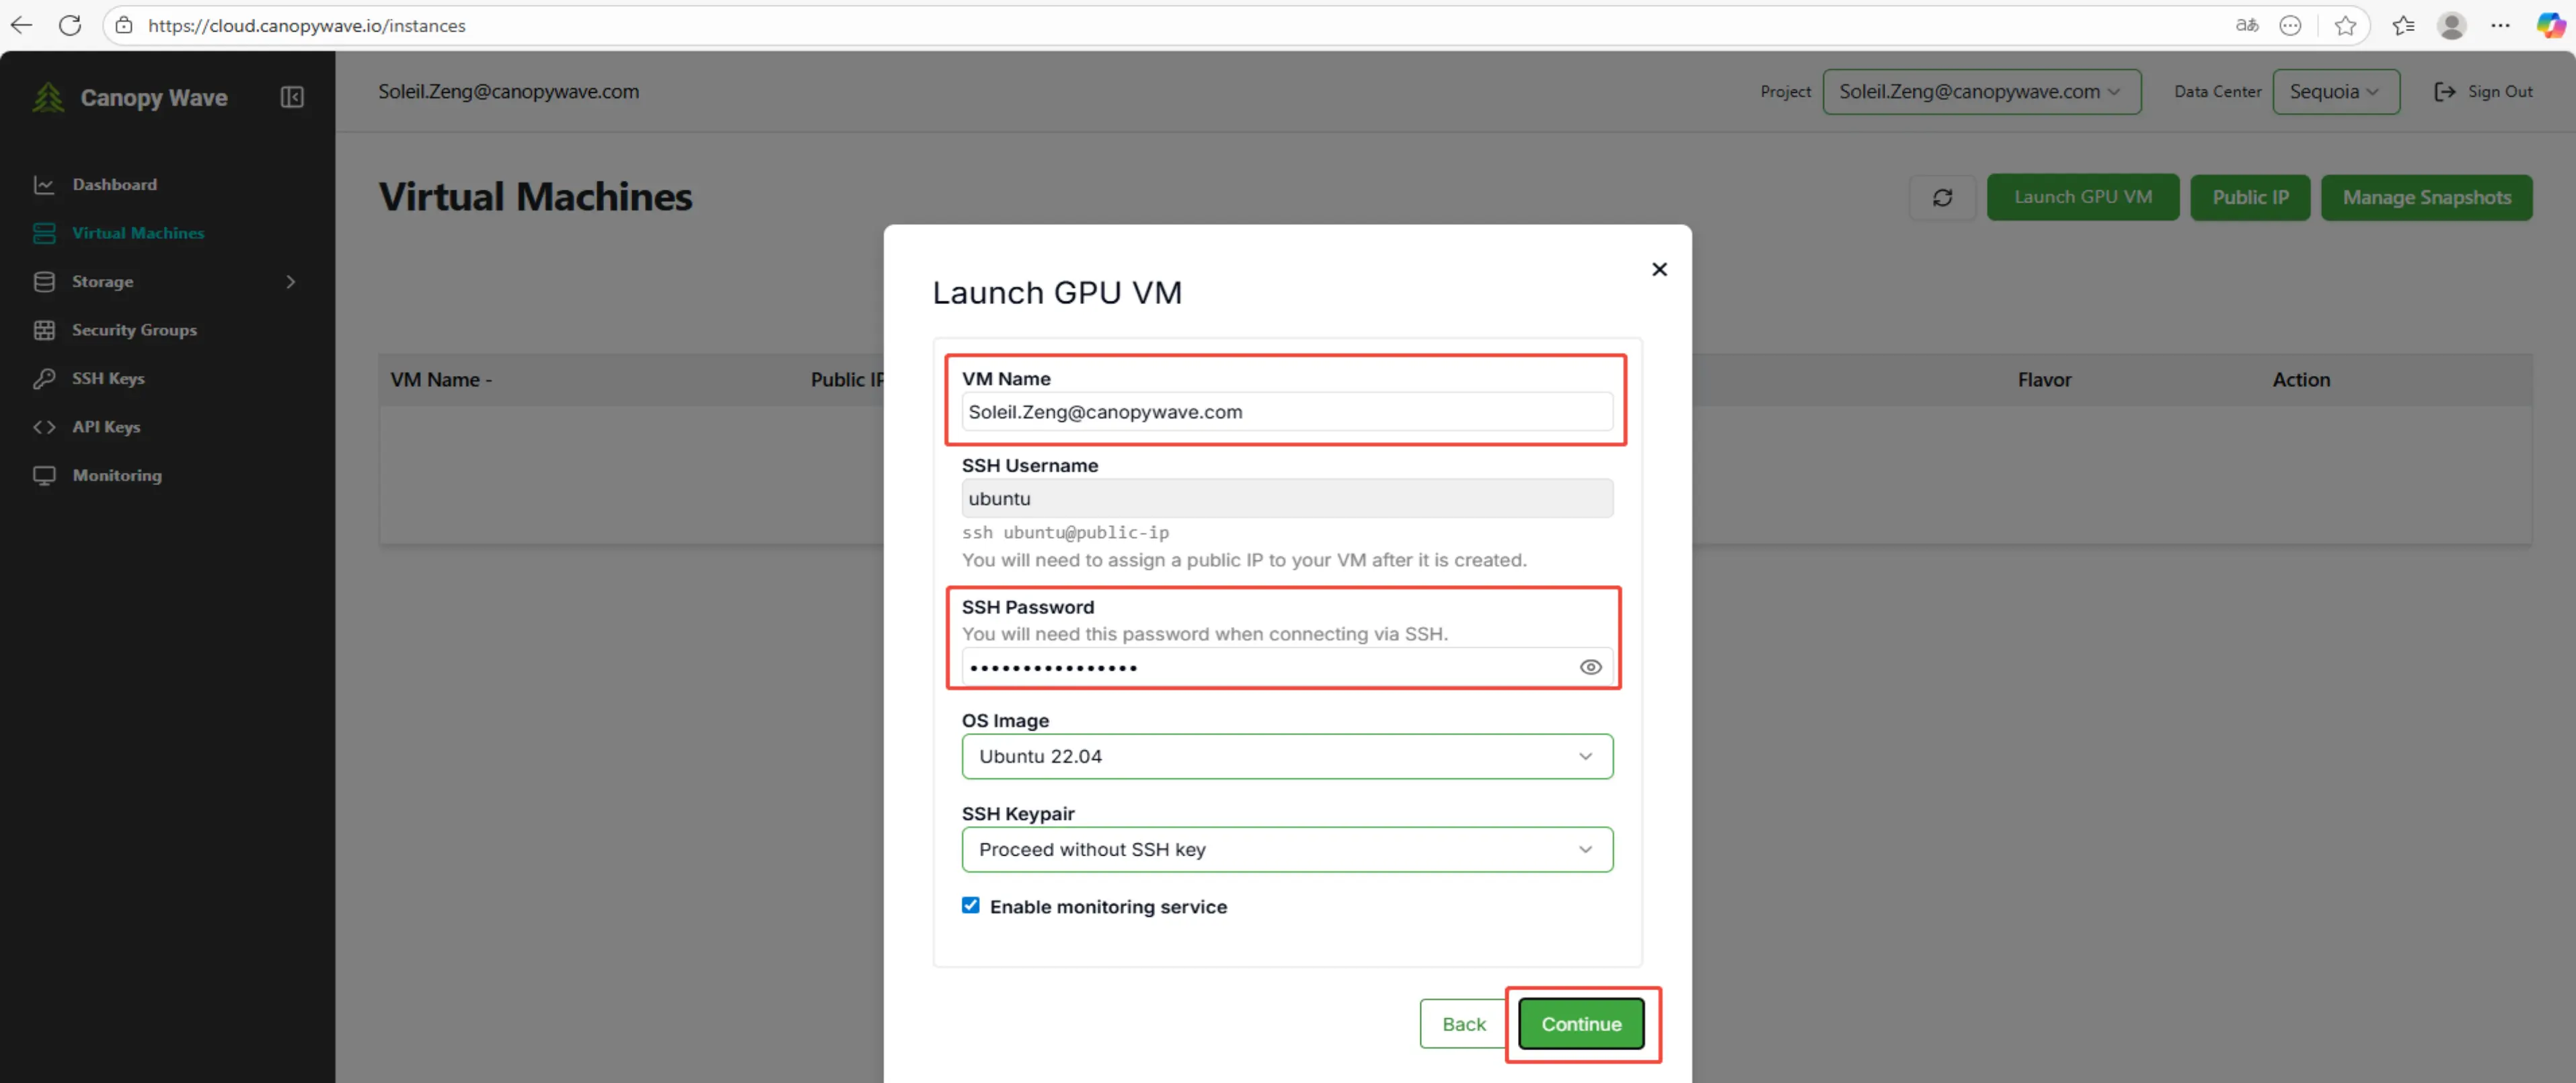
3) VM Configuration
Enter "VM Name" and "SSH Password", then click the "Continue" button.
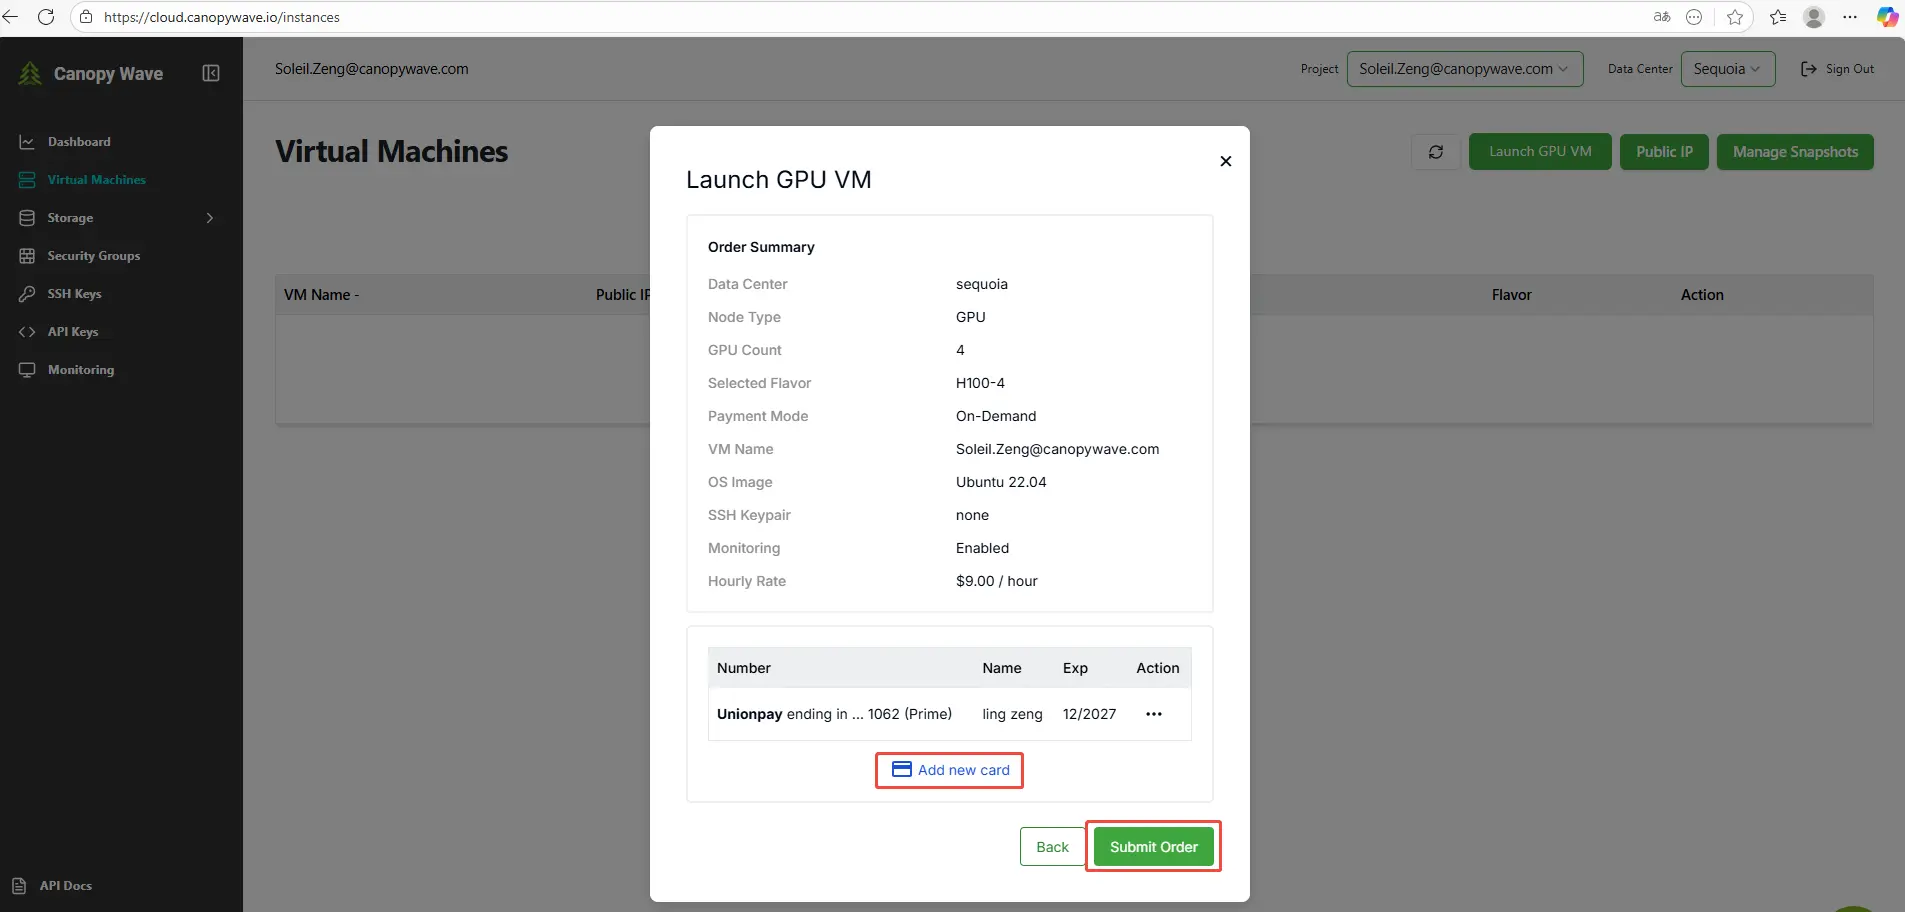
4) Payment Information
Click Add New Card to enter and save your payment information.
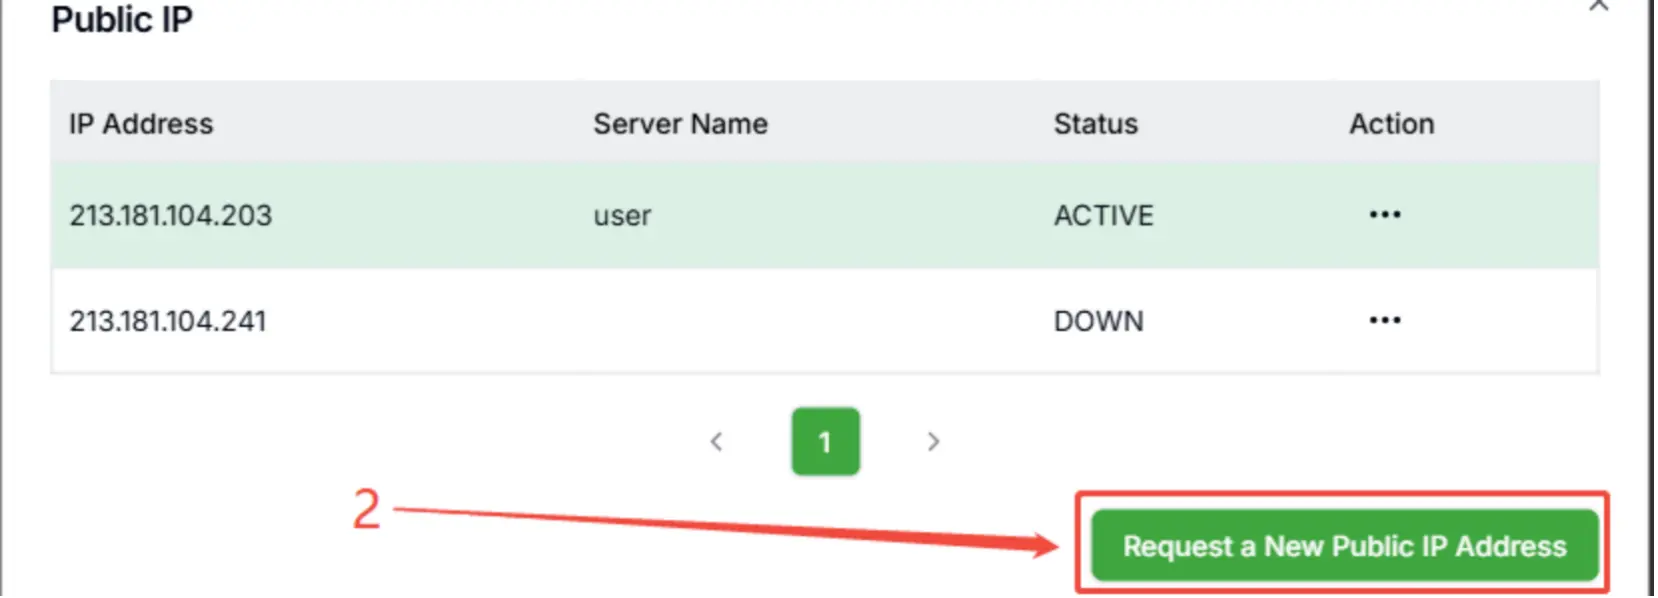
5) Request Public IP
Click the Public IP button to request a public IP address for your instance.
Note: Each VM requires only one public IP address.


6) Assign Public IP
Click the highlighted text to assign the Public IP to your instance.


Congratulations! The instance setup is now complete, and you may begin using your instance immediately.