
When developing applications or working on projects, many people encounter the same problem: they want their applications to have AI capabilities, and they want to integrate large language models like ChatGPT, Claude, and DeepSeek, but they get stuck at the first step—the API Key. What exactly is API Key? Why does every platform require it? Where can you get one? And how do you use API key once you have it? This article will explain all these questions in detail.
What is an API?
API stands for Application Programming Interface. Sounds technical? Imagine you're at a restaurant. Sitting at your table, you don't need to go into the kitchen or know how the chef cooks the food. You only need to do one thing: tell the waiter what you want to eat. The waiter will convey your request to the kitchen and then bring you the finished dish.
In this scenario:
• You = the developer (or your application)
• The kitchen = the backend of the AI service (e.g., OpenAI's servers)
• The waiter = the API
The API is the "waiter" that helps you communicate; it defines a set of rules: you make requests in the specified format, and it helps you get the results. You don't need to know how the AI model works internally; you just need to know how to "order."
What is an API Key?
Once you understand APIs, API Keys are easy to understand. An API Key is the "key" or "pass" to access the API. It looks like this—a string of seemingly random characters:

Continuing with the restaurant analogy: If the API is the waiter, then the API Key is your membership card. Before the waiter (API) serves you, they will scan your membership card (API Key) to confirm a few things:
1. Who are you? — Authentication
2. Are you eligible for this service? — Access control
3. How much have you spent this month? — Usage tracking and billing
Without this "membership card," the waiter won't even acknowledge you.
The three core functions of an API Key:
1. Authentication — Confirming "who you are"
When your program sends a request to the AI service, the API Key acts like your ID card. The server uses it to confirm that the request comes from a legally registered user.
2. Access Control — Confirming "what you can do"
Different API Keys may have different permissions. For example, some keys can only call basic models, while others can call the most advanced models; some keys can only request 10 times per minute, while others can request 1000 times.
3. Usage Tracking — Recording "how much you've used"
Every API call is recorded under your account. How is the monthly bill calculated? It's based on the call records associated with this API Key.
Why is it "essential" for AI development to understand this?
Because current mainstream AI services such as OpenAI ChatGPT/GPT-4, Anthropic (Claude), Google Gemini, and QWEN all require API keys. This means that whether you want to create an AI chatbot, an intelligent writing assistant, or an automated customer service system, the first step is: applying for an API Key. Without understanding API Keys, your AI application won't even be able to "start."
The complete API Key usage process:
Step 1: Obtain an API Key
Taking OpenAI as an example, the process is roughly as follows:
1. Register and log in to the OpenAI website.
2. Go to the "API Keys" management page.
3. Click "Create new secret key."
4. Give your Key a name (for easy management).
5. Immediately copy and save it.
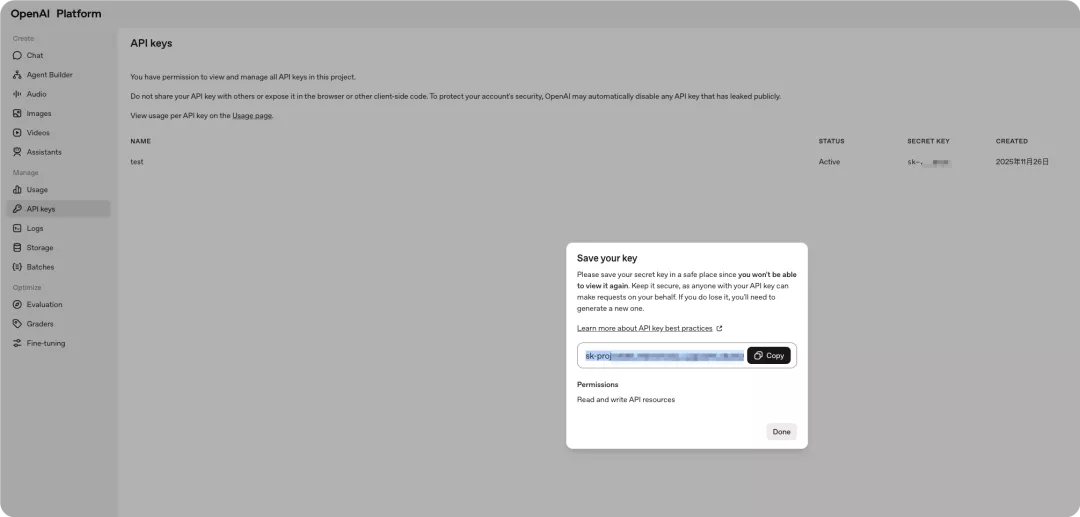
Step 2: Securely Store the API Key
Once you have the Key, how do you store it? Incorrect example: Never write the API key directly into your code. The problem with this is that if you upload your code to GitHub, send it to a colleague, or share a screenshot, your Key will be exposed. The correct approach is to use environment variables. Environment variables are operating system-level configurations and will not appear in your code files. Methods for setting environment variables:
• Mac/Linux: Enter export OPENAI_API_KEY="your_key" in the terminal.
• Windows: Add the environment variable in system settings.
• In your project: Use a .env file with the python-dotenv library.
Step 3: Calling the API in your code
Taking the Claude API as an example, the complete code looks like this:
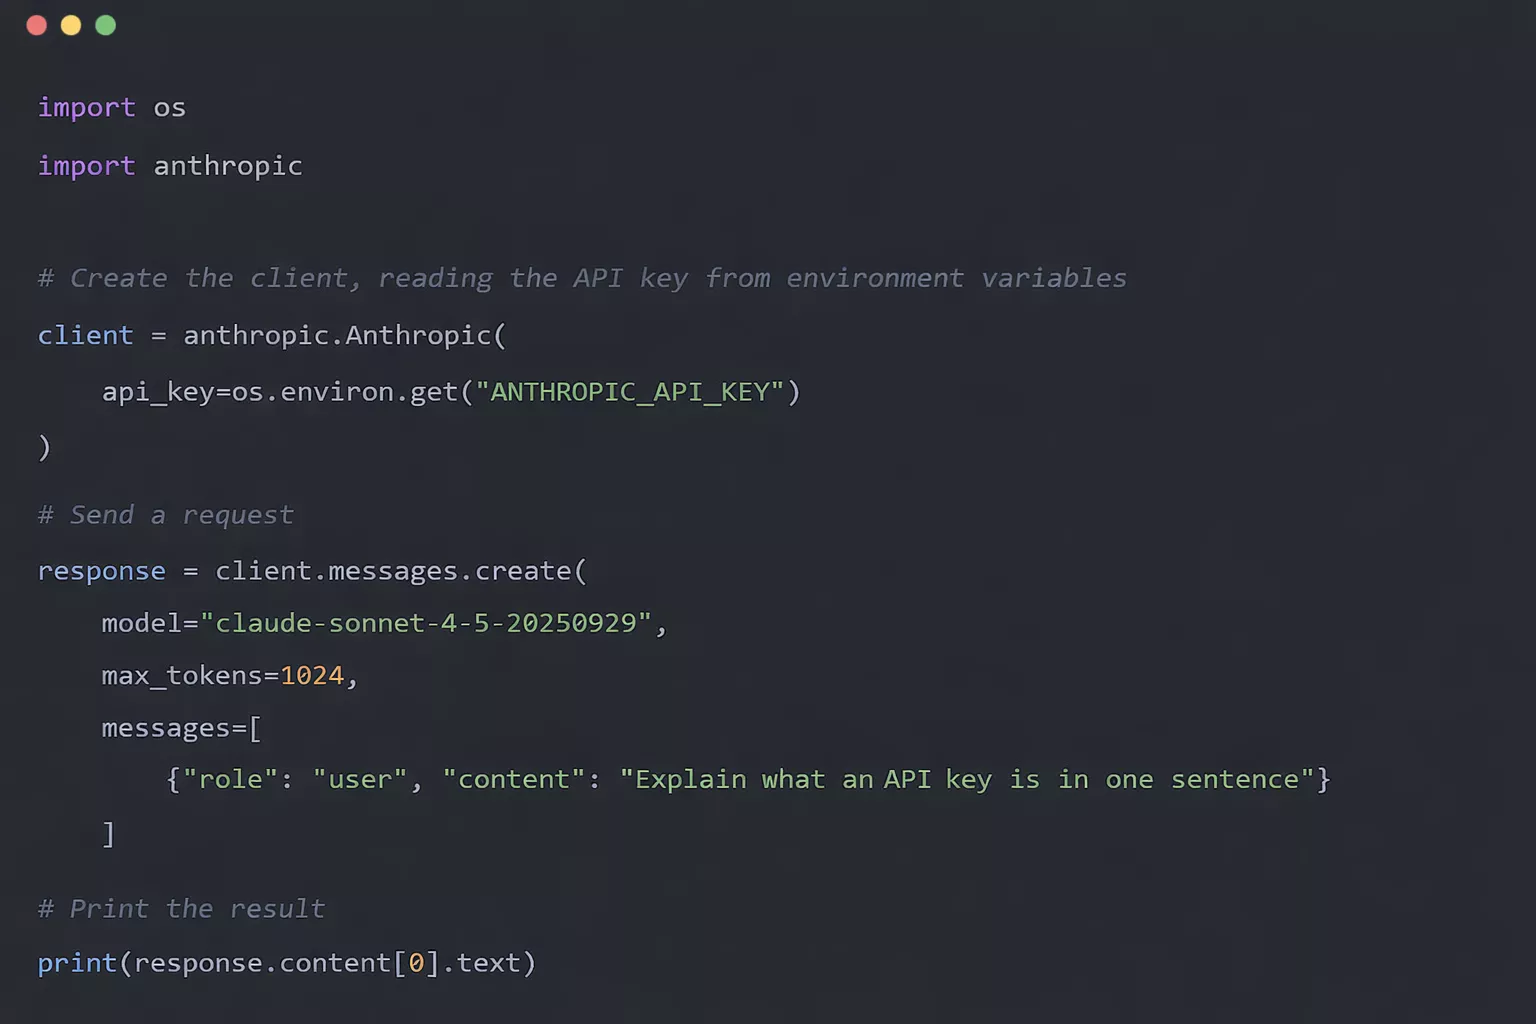
It's that simple; a few lines of code can give your program AI capabilities.
The painful consequences of API Key leaks
An API Key is essentially money. Whoever obtains it can use your account to call the API, and all the costs will be charged to you. Even worse, automated scripts can make a large number of requests in a short time, and by the time you notice, the bill is often already substantial. The most common leakage scenario is accidentally uploading files containing the key to GitHub; in addition, code screenshots without proper masking, storing the key in cloud documents, or casually sending it to others via chat tools can all expose the key.
How to protect your API Key? The four important things:
1. Never hardcode: Don't write the Key directly in the code; use environment variables instead.
2. Check before uploading: Ensure sensitive files are excluded by .gitignore.
3. Rotate regularly: Generate a new Key periodically and delete the old one.
4. Set spending limits: Set a monthly limit in the platform's backend so that even if something goes wrong, the losses are controllable.
Summary
In AI development, if you need to call large language models, the API Key is an unavoidable hurdle. Applying for it isn't difficult; what truly determines whether you can develop successfully is the subsequent management: storing the Key in environment variables, avoiding hardcoding, not uploading it to public code repositories, regularly changing it, and setting spending limits... These seemingly trivial habits can help you avoid many unnecessary losses. Essentially, an API is a way for different programs to communicate, and the API Key is the "identity card" and "permission certificate" for this communication. Using and managing it correctly is the most basic and important step in entering the world of AI programming.